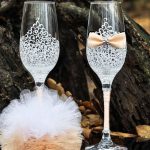
A Creative Touch of Elegance: DIY Wedding Glasses
Crafting your wedding decorations adds a personalized and unique touch to your special day. One delightful and meaningful project is making your wedding glasses. Creating personalized wedding glasses allows you to infuse your style and creativity into a functional and memorable keepsake.
Materials You’ll Need
- Plain glassware (flutes or regular glasses)
- Acrylic paint in your chosen wedding colors
- Fine paintbrushes
- Painter’s tape
- Clear sealant spray
- Decorative elements (optional, such as rhinestones, pearls, or ribbon)
Step-by-Step Guide
Clean the Glasses
Start by thoroughly cleaning the glasses to ensure they are free of dust or residue. This will provide a clean surface for the paint to adhere to.
Design Planning
Before you start painting, plan the design you want for your wedding glasses. Consider incorporating your wedding colors, initials, or wedding date. Sketching the design on paper can help you visualize the final product.
Prepare the Glasses for Painting
Use painter’s tape to mark off the areas you want to paint. This will help you create clean and precise lines. If you plan to paint the base of the glasses, cover the stems with tape to avoid accidental splatters.
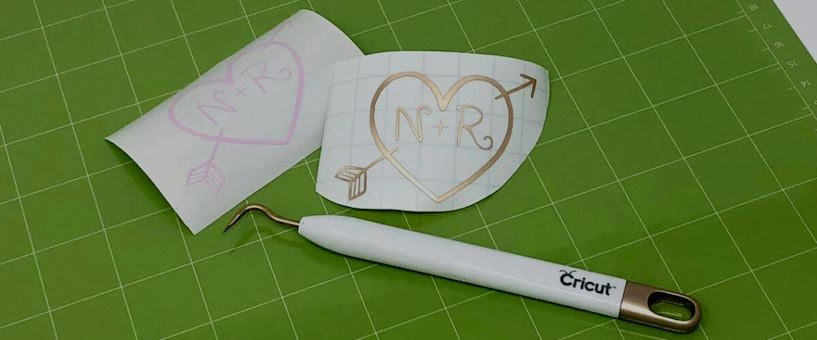
Painting
Carefully apply the paint within the taped-off areas using fine paintbrushes and your chosen acrylic paint. Be patient and allow each layer to dry completely before adding another coat. This will ensure a smooth and even finish.
Adding Details
Once the base coat is dry, you can add details to enhance the design. Add swirls, dots, or other decorative elements matching your wedding theme. This is where you can get creative and make the glasses truly unique.
Drying Time
Allow the painted glasses to dry completely before moving on to the next step. This might take a few hours, depending on the type of paint you’re using.
Sealing the Paint
Apply a clear sealant spray over the painted areas to protect the paint and ensure its longevity. This step is crucial for preventing the paint from chipping or fading over time.
Optional Embellishments
If you want to add flair to your wedding glasses, consider attaching rhinestones, pearls, or decorative ribbons. Be sure to use a strong adhesive suitable for glass.
Final Touches
Once everything is dry and sealed, remove the painter’s tape carefully. Inspect your glasses for any touch-ups and make any necessary corrections.